Word to the Trees
The wonderful artist Michael Blume aka whatever mike reached out to us about creating a music video for his latest single, "Word to the Trees". Below is a list of steps and techniques we used to develop an animated music video. Enjoy the ride! :)
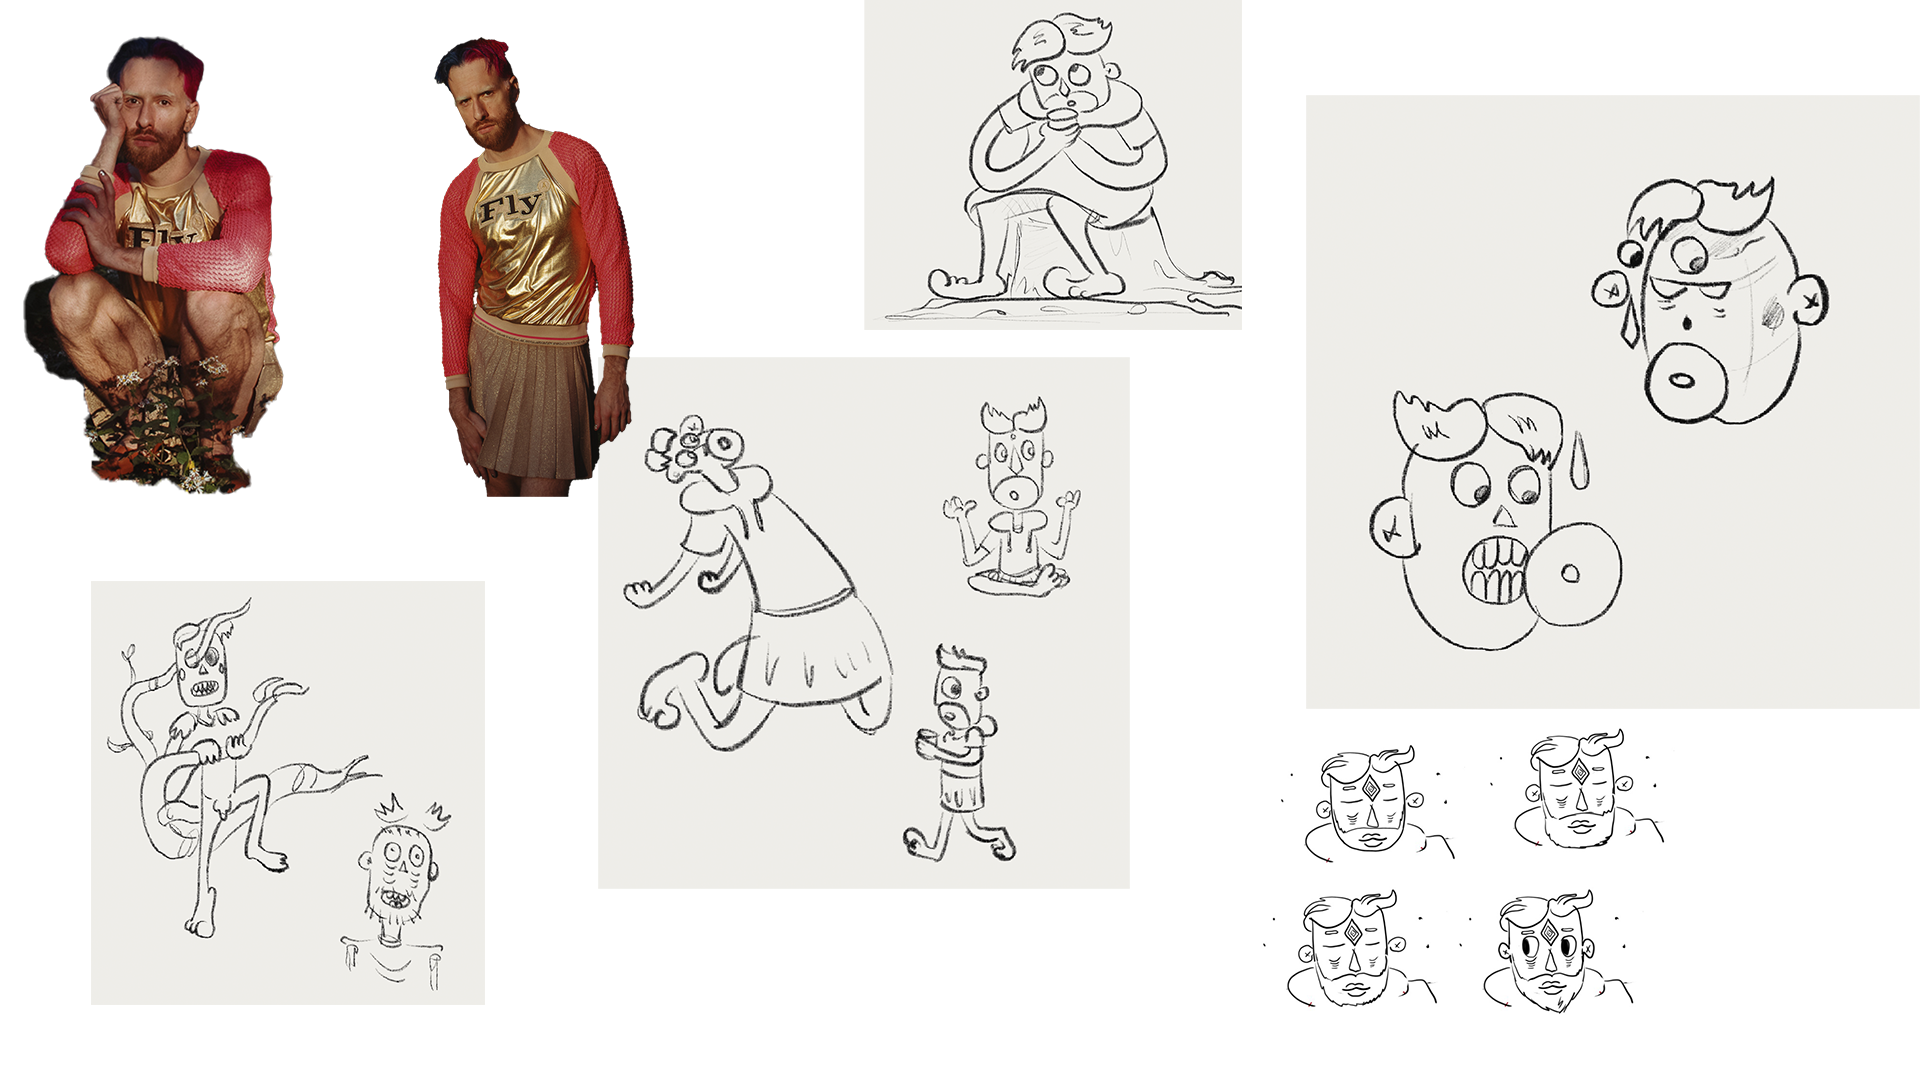
First, we create a mood board to get a general feel for the direction of the visuals.
Ideation

We started designing the character based on the photo references below at the artist's request. We also include ideas from the song's lyrics: growth, morphing, death, rebirth, etc.
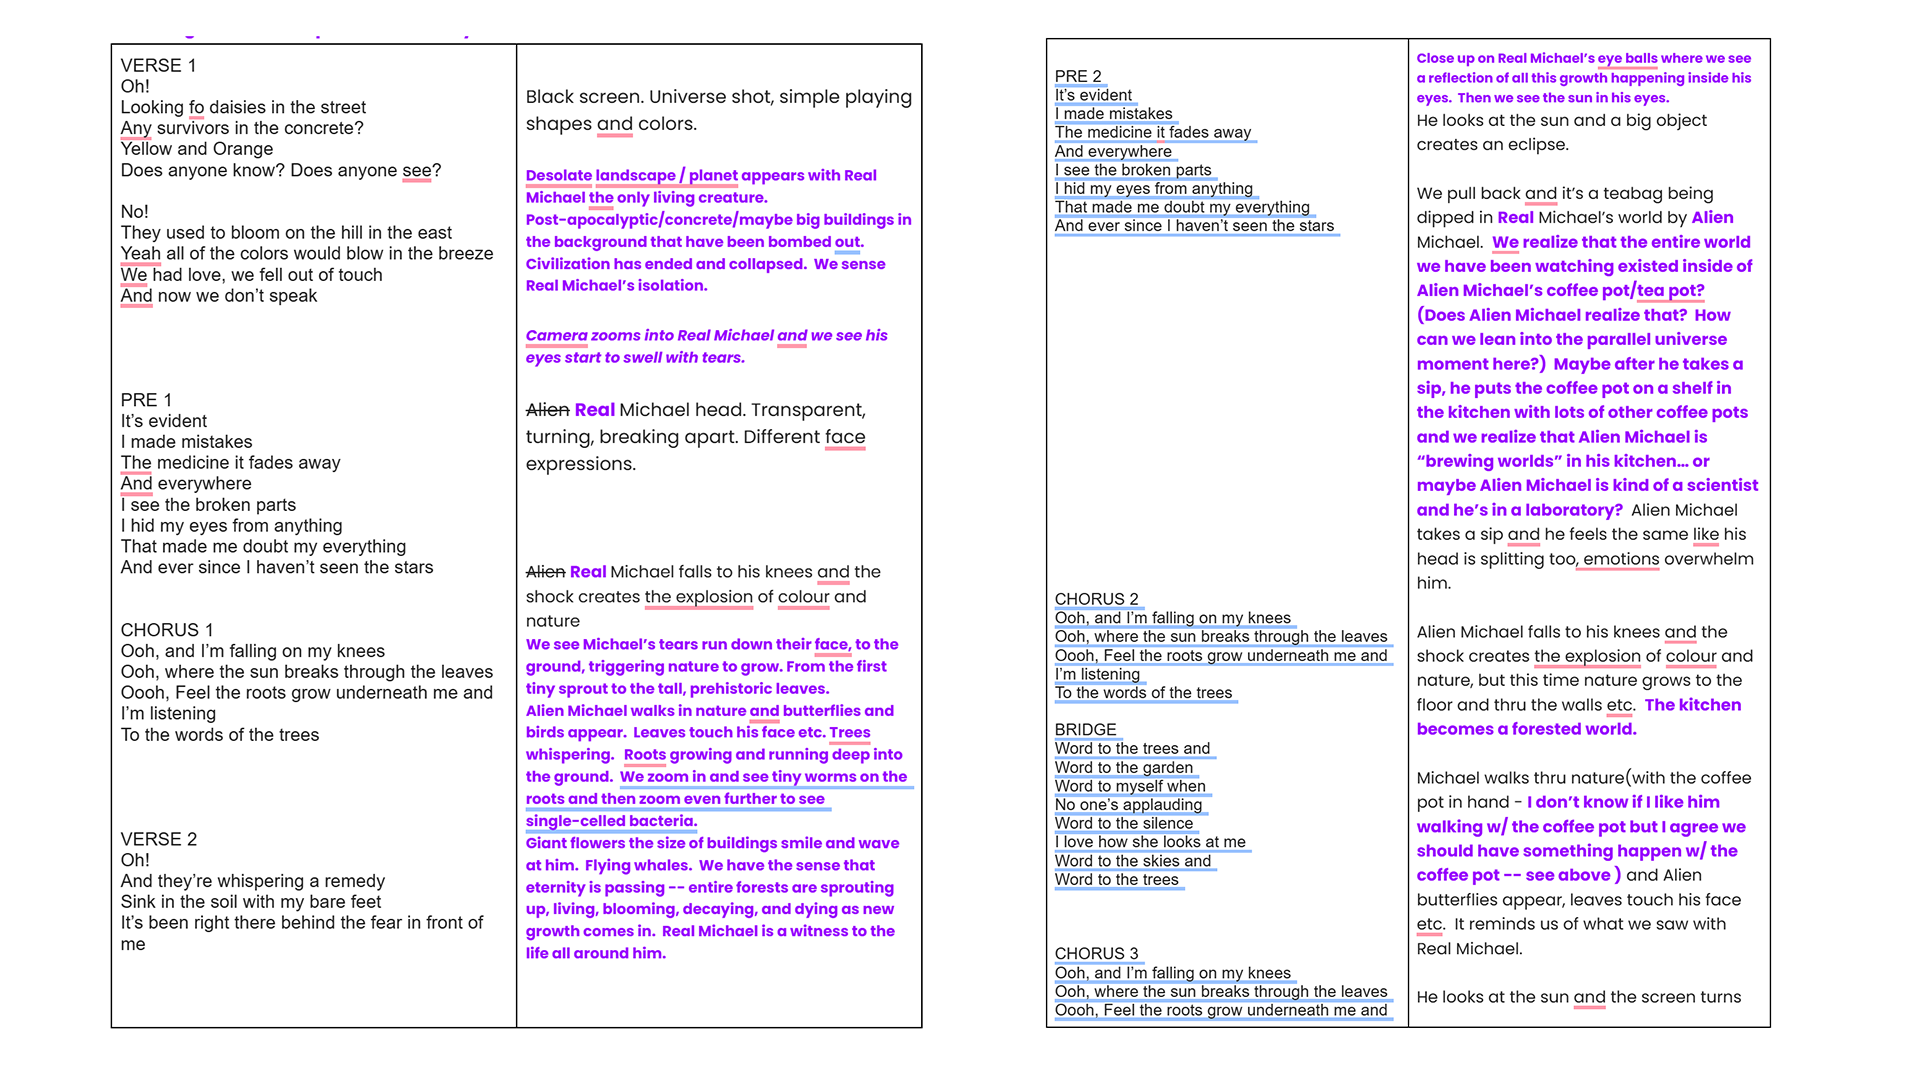
We created a Visual Script that has the lyrics on the left side and the visuals on the right so we could brainstorm ideas:
Since the video is over three minutes long, we start with a sketching phase that covers all of the lyrics and addresses all of the themes in the song. This rough storyboard gives us a bird's eye view of the visuals.


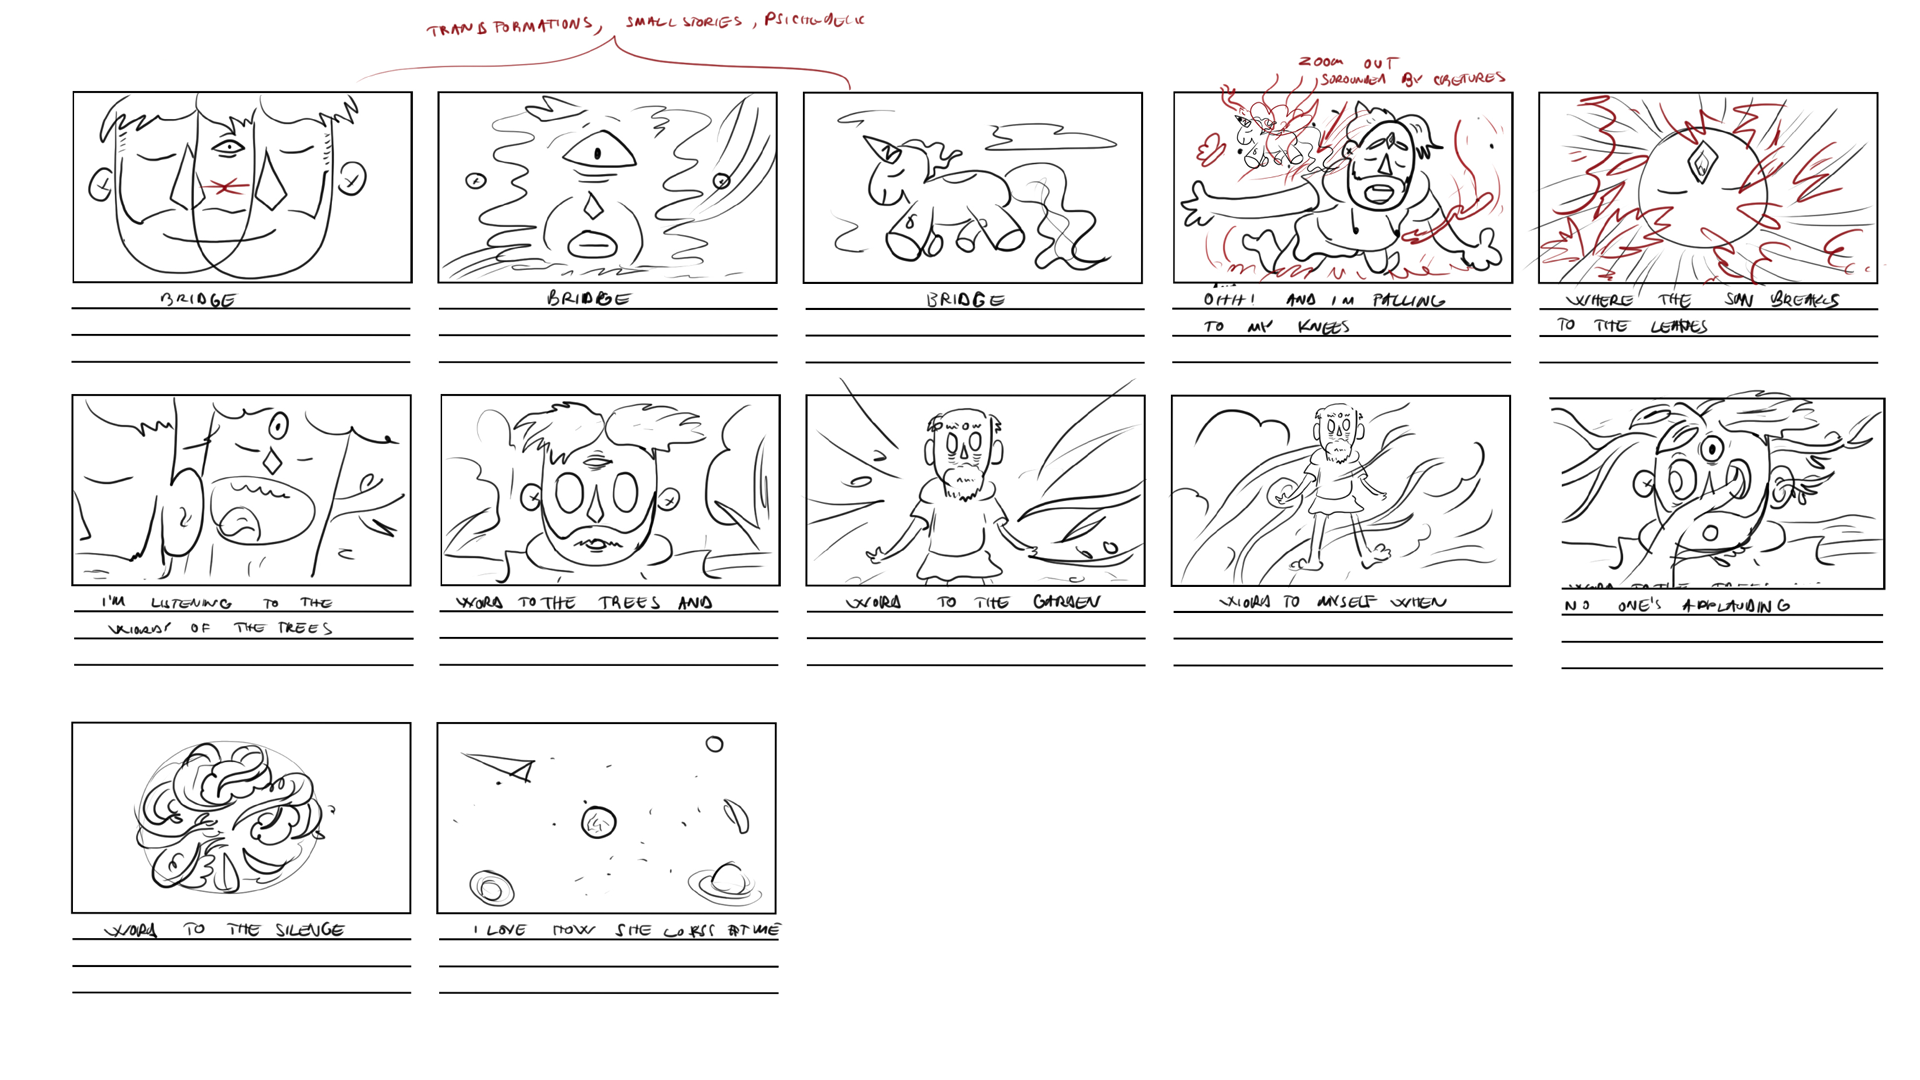
After feedback from the artist, we make modifications, flesh out the storyboard sketches more, and fill the gaps with more scenes to develop an animatic. The animatic is an introductory presentation of the sketches set on the music track.
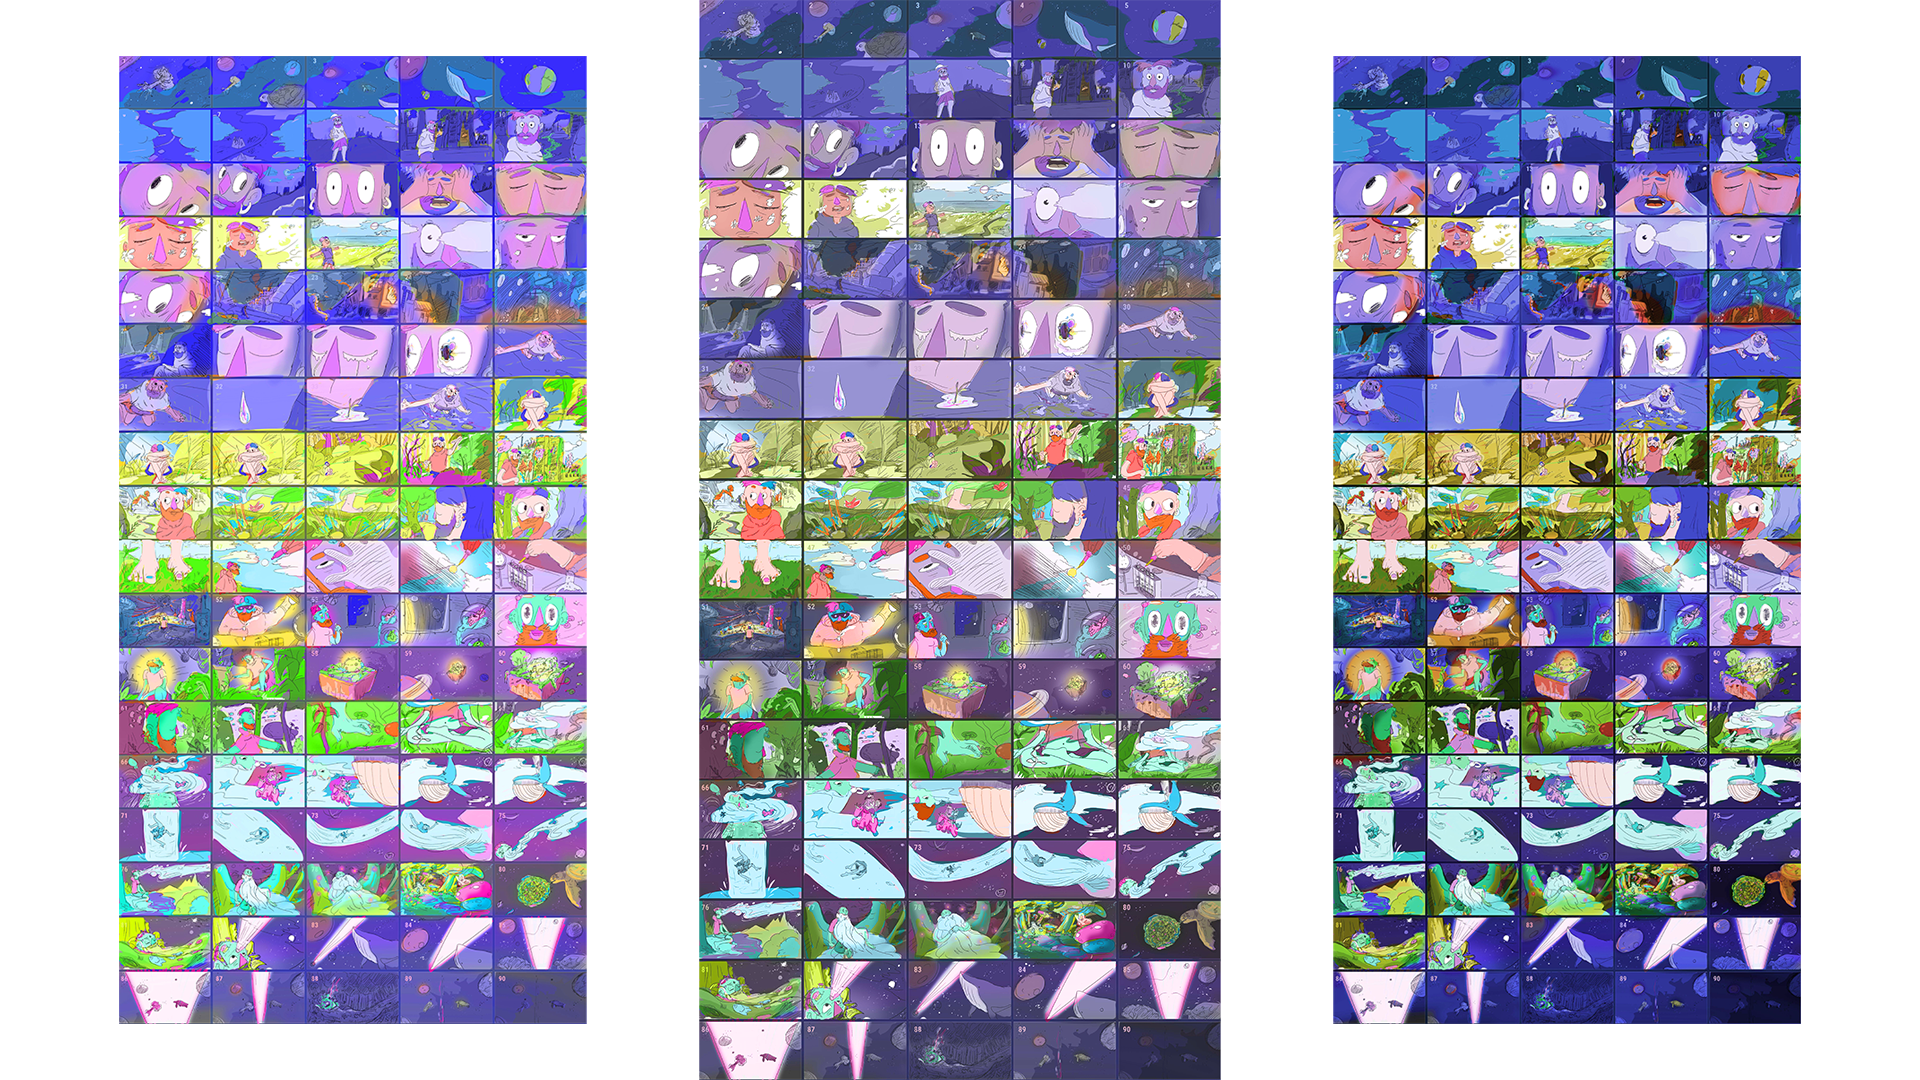
With the sketch phase completed, it's time to move into the design, but we have to talk about color before we can do that. Creating a color script will give us a sense of the color we will use in the video and how it evolves. It is the perfect birds-eye-view of the color scheme:
After the color animatic, we can move into the design phase. We start with some style frames. We choose key moments in the video and take them to finish. They will then set the tone for the rest of the designs:
Setting the chosen color script on top of the music gives us a great impression of the visuals since we have both color and ideas coming together to form a color animatic:

The next step after designing all the frames is creating an animatic with the finished boards. We call this a boardimatic :
We are finally ready for animation. For this particular project, we chose to go with a combination of cell animation and aftereffects. Every scene is imported from Photoshop and given a parallax effect in Aftereffects to add depth.
The next important step is to isolate which scenes need cell animation (frame by frame) and which can work with just some simple rigging or aftereffects animation. Below are a couple of examples of cell animations created in Adobe Animate:
After bringing all the scenes together, we wanted to give the video a little color and contrast adjustment plus a noise effect to get rid of the super clean and smooth look. The result is subtle, but it gives the video that extra "grunge" look it needs.
With all the elements put together and a little processing, we arrive at the final result: